
American Hunter Feeder Instruction Manual: A Comprehensive Guide
American Hunter provides quality deer feeders, and this manual covers setup, programming, maintenance, troubleshooting, and warranty details for optimal wildlife management success.
American Hunter feeders are engineered for dedicated hunters and wildlife enthusiasts seeking reliable and effective game management solutions. These feeders deliver consistent, controlled feed dispersal, attracting and sustaining healthy deer populations.
From hanging models to larger capacity options, American Hunter offers a diverse range of feeders to suit various needs and terrains. Understanding your feeder’s specific features, as detailed in this manual, is crucial for maximizing its performance.
This guide provides comprehensive instructions on assembly, programming, maintenance, and troubleshooting, ensuring years of dependable operation. Proper use and care will enhance your hunting experience and contribute to responsible wildlife conservation. Explore available accessories and the mobile app for advanced control.
Understanding Different American Hunter Feeder Models
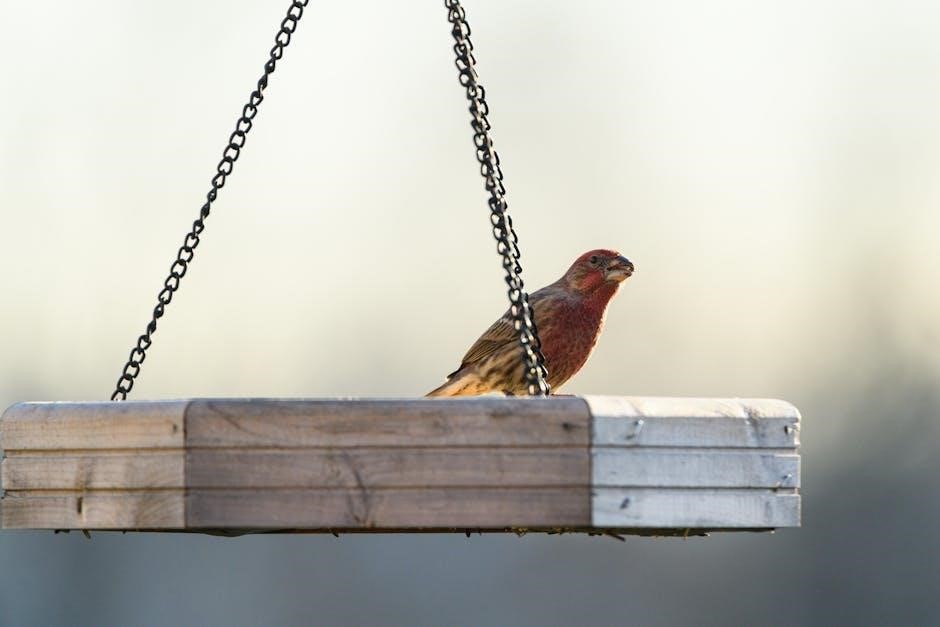
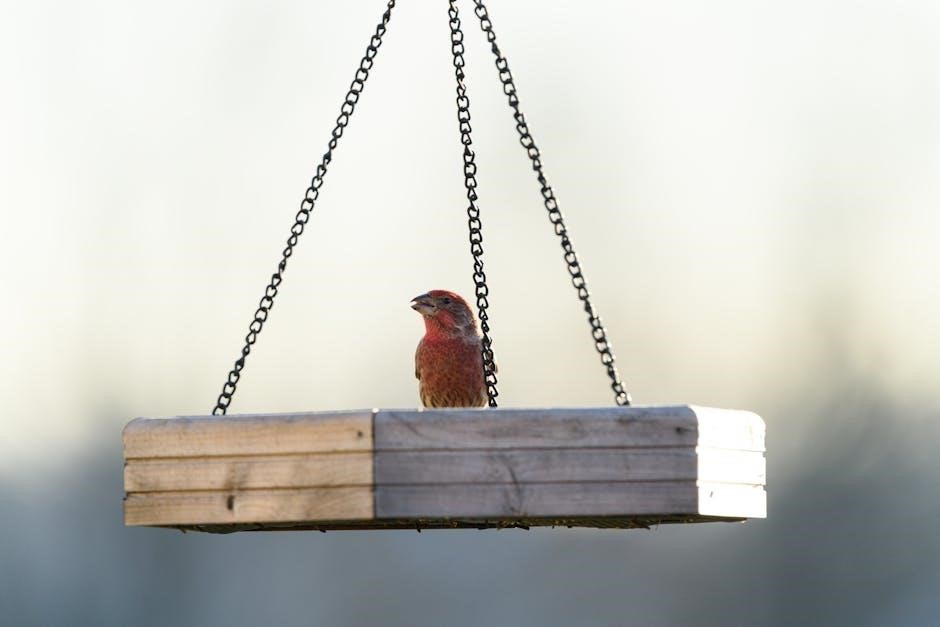
American Hunter offers a variety of feeder models, each designed for specific applications. Hanging feeders, like the 40lb model, are ideal for smaller properties or supplemental feeding; Larger, 55-gallon capacity feeders are suited for high-density deer populations and extended periods between refills.
The Pro Hunter Feeder Kit provides a complete setup, while specialized kits like the Sunslinger and RD-PRO offer unique features. Key distinctions include hopper capacity, timer functionality, and mounting options.
Some models feature the innovative Twist-Lock system, ensuring secure hopper attachment. Familiarizing yourself with the specific components and capabilities of your chosen model is essential for optimal performance and efficient game management.
Safety Precautions and Warnings
Important: Always disconnect power before performing any maintenance or adjustments on your American Hunter feeder. Exercise caution when assembling, as some components may have sharp edges. Ensure the feeder is securely mounted to prevent falling and potential injury.
Never attempt to repair the timer mechanism yourself; contact qualified support for assistance. Keep children and pets away from the feeder during operation. Avoid placing the feeder in areas with high human traffic.
Regularly inspect the mounting hardware for corrosion or damage. Be mindful of the weight of a full feeder when lifting or moving it. Always follow local regulations regarding wildlife feeding practices.
Setting Up Your American Hunter Feeder
Proper setup involves assembling components, carefully considering mounting location, and filling the feeder with appropriate feed for successful and efficient operation.
Assembling the Feeder Components
Carefully unpack all components and verify against the parts list to ensure everything is present. Begin by attaching the hopper to the feeder body, aligning and securing with the provided machine screws through the pre-pressed hex nuts – typically six screws are needed.
Ensure a tight fit to prevent feed leakage. Next, install the timer unit, connecting the wiring harness according to the diagram. For models with a twist-lock feature, align the hopper and rotate to lock securely.
Double-check all connections and screws for tightness before proceeding. Refer to the specific kit instructions (AH-AADK, Sunslinger, RD-PRO) for detailed diagrams and guidance, downloadable from the American Hunter website.
Mounting and Placement Considerations
Select a sturdy mounting location capable of supporting the feeder’s weight when full – typically a tree or post. Ensure the area around the feeder is clear of obstructions to allow for proper feed dispersal. Consider prevailing wind direction to minimize feed waste.
Mount the feeder at a height that prevents access by unwanted animals while remaining accessible for filling and maintenance. A height of 4-6 feet is generally recommended.
Avoid placing feeders directly in heavily traveled deer trails, as this can create excessive competition. Position feeders near cover to provide deer with a sense of security while feeding. Regularly inspect the mounting hardware for stability.
Filling the Feeder with Feed
Before filling, ensure the feeder is securely mounted and the timer is set to prevent accidental dispensing. Use high-quality deer feed appropriate for your region and the time of year. Avoid using old or moldy feed, as this can harm wildlife.
Carefully pour the feed into the hopper, avoiding spillage. Do not overfill the feeder, as this can cause jamming or inconsistent dispensing. Regularly check the feed level and refill as needed to maintain a consistent food source.
Inspect the hopper for any damage or obstructions before and after filling. Keep the area around the feeder clean to deter pests and maintain a sanitary feeding environment.
Programming the Feeder Timer
Effectively setting the timer controls feeding schedules and amounts, utilizing display functions for optimal deer attraction and consistent, reliable operation of your American Hunter feeder.
Setting the Timer for Optimal Feeding Schedules
Establishing a consistent feeding schedule is crucial for attracting and maintaining deer activity. Begin by considering local hunting regulations and deer behavior patterns in your area. Program multiple feeding times daily, spaced evenly, to mimic natural foraging opportunities.
Start with a conservative schedule and observe deer usage, adjusting times based on their presence. Consider seasonal changes; increase feeding frequency during colder months when natural food sources are scarce.
Utilize the timer’s flexibility to create varied schedules, preventing deer from becoming overly accustomed to predictable feeding times. Experiment with different durations for each dispensing cycle to determine the optimal amount of feed. Remember to account for daylight savings time adjustments to maintain accuracy.
Adjusting Feed Dispensing Amounts
Precise feed control is vital for managing costs and preventing waste. American Hunter timers allow you to customize the duration of each dispensing cycle, directly impacting the amount of feed released. Start with shorter durations and gradually increase them, observing the resulting feed distribution.
Consider the type of feed used; heavier feeds require longer dispensing times. Monitor the feeder’s output to ensure consistent and accurate portions. Adjust settings based on deer herd size and local food availability.
Avoid overfilling, which can lead to spoilage and attract unwanted animals. Regularly check the feed level and adjust dispensing amounts accordingly. Fine-tuning these settings optimizes feeding efficiency and maximizes your investment.
Understanding Timer Display and Functions
The American Hunter timer features a user-friendly display showing current time, programmed feeding times, and timer status. Buttons allow for setting the current time, programming multiple feed times per day, and adjusting dispensing durations.
The display often indicates battery life, prompting replacement when low. Familiarize yourself with the “Set,” “Mode,” and “Adjust” buttons for efficient programming. Some models include a “Manual Dispense” function for testing or supplemental feeding.
Refer to the specific model’s diagram for button locations and functions. Understanding these controls ensures accurate scheduling and optimal feeder performance, maximizing your hunting success.
Maintenance and Troubleshooting
Regular inspection and cleaning are vital for optimal performance. Address common issues like clogs or timer malfunctions promptly, ensuring consistent feed delivery.
Regular Cleaning and Inspection
Consistent maintenance extends your American Hunter feeder’s lifespan and ensures reliable operation. Inspect the hopper regularly for any buildup of old feed, which can cause clogs and impede dispensing. Thoroughly clean the hopper at least twice a year, or more frequently in humid environments, using a mild detergent and water.
Check all components – the timer, motor, and dispensing mechanism – for signs of wear or damage. Ensure the battery in the timer is fresh and functioning correctly. Inspect the mounting hardware to confirm the feeder remains securely attached to its post or structure. Look for any signs of rodent activity and address them immediately to prevent damage to wiring or feed contamination. A proactive approach to cleaning and inspection minimizes downtime and maximizes your feeder’s effectiveness.
Common Issues and Their Solutions
Feed clogs are frequent; clear them by manually removing the obstruction and ensuring the feed is dry and free-flowing. If the timer isn’t functioning, replace the battery and verify the programming is correct. A motor that won’t turn may indicate a wiring issue or a faulty motor – check connections and consider replacement.
Inconsistent dispensing can stem from an improperly adjusted feed level or a damaged dispensing mechanism. Ensure the feeder is level and the dispensing opening isn’t blocked. If rodents have damaged wiring, carefully repair or replace the affected components. Regularly inspecting and addressing these common issues promptly will keep your American Hunter feeder operating efficiently and reliably throughout the hunting season.
Replacing Parts and Components
American Hunter feeders are designed for durability, but parts may eventually require replacement. When replacing components, always disconnect the power source first. Common replacements include the timer module, motor, and dispensing auger. Ensure the new part is compatible with your specific feeder model.
For the twist-lock feature, carefully align and secure the new hopper. When replacing wiring, use appropriately sized wire connectors and ensure a weatherproof seal. Refer to the parts diagram in this manual or on the American Hunter website for correct component identification. Proper installation is crucial for maintaining feeder functionality and safety. Contact customer support if you encounter difficulties during the replacement process.
Advanced Features and Accessories
American Hunter offers a mobile app for remote control, plus accessories like additional hoppers and solar panels to enhance your feeding setup and experience.
Utilizing the American Hunter Mobile App
The American Hunter Mobile App revolutionizes feeder management, offering convenient control directly from your smartphone. This free app, available on iPhone, allows users to remotely adjust feeding schedules, monitor battery levels, and receive alerts regarding low feed levels or operational issues.
Connecting your feeder to the app requires initial setup following the in-app instructions, typically involving linking the feeder’s control board to your Wi-Fi network. Once connected, you gain real-time access to feeder status and can make changes without physically visiting the location.
The app’s intuitive interface simplifies programming and provides valuable data insights, optimizing your feeding strategy for maximum effectiveness. It’s a powerful tool for serious wildlife enthusiasts and game managers.
Exploring Available Feeder Accessories
American Hunter offers a range of accessories to enhance your feeding setup and cater to specific needs. For 55-gallon feeders, specialized accessories are available, expanding functionality and customization options. The Twist-Lock feature allows compatibility with various American Hunter hoppers, ensuring a secure and reliable connection.
Additional accessories include mounting brackets for diverse terrain, predator guards to protect feed from unwanted visitors, and solar panels for extended battery life in remote locations. Kits like the AH-AADK, Sunslinger, and RD-PRO provide convenient bundles with essential components.
These accessories are designed for easy installation and integration, maximizing the efficiency and effectiveness of your American Hunter feeder system.
Understanding the Twist-Lock Feature
American Hunter’s innovative Twist-Lock feature provides a secure and reliable connection between the hopper and the feeder body. This system simplifies installation and ensures a tight seal, preventing feed leakage and protecting against weather elements.
To utilize the Twist-Lock, align the hopper with the feeder, then carefully screw six machine screws through the top of the feeder into the pre-pressed hex nuts. This creates a robust and stable connection.
The Twist-Lock is compatible with any American Hunter hopper equipped with this feature, offering versatility and ease of use when replacing or upgrading components. It’s a key element in the feeder’s durability and performance.
Warranty Information and Registration
American Hunter offers a product warranty for its feeders; registration is crucial for coverage. Contact support for details and to register your newly purchased feeder today!
American Hunter Product Warranty Details
American Hunter stands behind the quality of its deer feeders, offering a limited warranty against manufacturing defects. This warranty covers components failing under normal use, excluding wear-and-tear items like timers or auger motors;
The warranty period varies by product, typically ranging from one to five years from the original purchase date. Proof of purchase is required for all warranty claims. Damage caused by improper installation, misuse, accidents, or unauthorized modifications voids the warranty.
American Hunter will, at its discretion, repair or replace defective parts. Shipping costs for returned items are the responsibility of the customer; This warranty provides exclusive remedies, and American Hunter is not liable for consequential damages. Please review the full warranty document available on our website for complete terms and conditions.
Registering Your Feeder for Warranty Coverage
Registering your American Hunter feeder is crucial to validate your warranty and ensure efficient claims processing. Visit our official website and locate the “Warranty Registration” section. You’ll need your feeder’s model number, serial number (found on the product label), and proof of purchase – a copy of your receipt or invoice.
Complete the online registration form with accurate information. Providing a valid email address allows us to send warranty confirmations and important updates. Registration should be completed within 30 days of purchase for optimal coverage.
Failure to register may delay or invalidate your warranty claim. Keep your registration confirmation for your records. American Hunter values your business and strives to provide a seamless warranty experience.
Contacting American Hunter Support
For dedicated assistance with your American Hunter feeder, our support team is readily available. You can reach us through several convenient channels. Visit our website’s “Contact Us” page for a comprehensive FAQ section addressing common inquiries.
Alternatively, you can call our toll-free customer support line during business hours (Monday-Friday, 8 AM to 5 PM CST). Our knowledgeable representatives are prepared to assist with troubleshooting, parts inquiries, and warranty claims.
Email support is also available; submit your questions through the online contact form, and we’ll respond promptly. American Hunter is committed to providing exceptional customer service and ensuring your complete satisfaction.